In early March, before the COVID-19 virus lockdown, we had a really enjoyable spring day garden work party (“permablitz”) tidying up the Westbury Arts Centre permaculture plots to prepare everything for growing. We made the most of each others’ company, learning tips from the gardeners in the group, working together to create more raised beds in the social area, and sharing the food treats we’d all brought for lunch.
Little did we know that would be the last time we would physically meet for a long time!
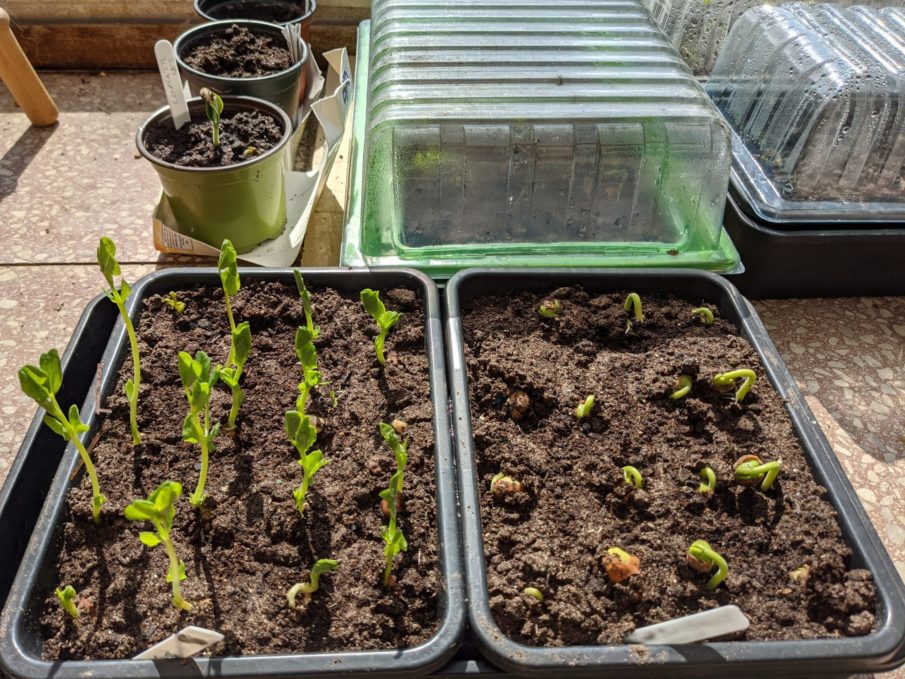
Before we left, a few of us managed to plant a few seeds to take home. The idea was that we would start them off by propagating them indoors before planting them in the beds at Westbury.
Suffice to say, since the Centre has been shut and we’ve all gone into lockdown, a handful of us have a lot of seedlings to take care of and later to share out. But that’s a different story!
This blog post is to show you that behind the scenes we’re still Planting Up and have some tips to share so that you can too 🙂
Planting seeds
We started by planting our seeds in clean seed trays and home-made pots made out of egg boxes and kitchen and toilet roll cardboard inners.
In hindsight, we’ll remember to put holes in the bottom of the egg boxes to allow water to drain out next time. After a while we also learnt it’s wise to label your containers with markers and not just on the cardboard which can get washed out after watering!
We liked the above video on how to make biodegradable plant pots to inspire our homemade seed pots. Be warned, the newspaper solution is a bit harder than it looks though!
Check out the RHS “How to sow seed indoors” for step by step instructions on how to get started with your seed sowing at rhs.org.uk/advice/how-to-sow-seed-indoors
We took our potted seeds home, covered the containers loosely with some kind of waterproof covering to keep them warm but still allowing them to breathe, and kept them somewhere warm.
With a daily misting with water, our first signs of germination appeared after about 10 days. The germination period differs massively for different seeds (and subject to their conditions) though.
It’s fantastic to see the first green shoots popping up and quite amazing to see how quickly they grow after that.

The plastic covering can be removed once the seedlings appear and for seedlings grown near a window, you’ll notice that they try to grow towards the light so it’s a good idea to keep rotating the container every couple of days to make sure the seedlings grow evenly.
When the seedlings got their second pair of leaves, we prepared individual pots with compost to carefully transplant them to. It’s a good idea to keep them out of direct sunlight as they adjust to their new, more spacious home, but remember to keep them well watered.
Preparing for planting outdoors
This is the growing stage we’re at now. Some seedlings are a lot further on than others, as some are still in their original containers whilst others have their own individual pots.
Once they’re more established, before we transplant them to the garden, we’ll need to “harden them off” for 1 or 2 weeks to help get them acclimatised to living outdoors with controlled exposure of what it will be like for them.
The idea is to keep them protected, gradually increasing their exposure to full sun and windy conditions as the adjacent video explains.
Once outside, it’s worth thinking about how you can still protect them when they’re finally in the ground. We liked this inexpensive, home-made cloche made from a plastic bottle to help protect the young plants from birds, slugs and other nibblers:
See the step by step instructions for how to make it here: gardengatemagazine.com/articles/how-to/plant/how-to-make-a-soda-bottle-cloche/
There are lots of similar materials like this we can use to make our own cloches. We’ve had lots of success with whey powder containers on our allotment in the past.
The main thing is keep upcycling and recycling, because as long as you remember to clean and store your creations, you can then use them again next year.
You can read more about planting seeds (indoors and outdoors) for growing your own food, by clicking here…


